
Banquette Design for the Goose Hollow Manor Project
- Ryan Harkrider

- May 26, 2020
- 3 min read
Updated: Jun 3, 2020
Today we talk banquette design for the Goose Hollow Manor project! (If you're just joining, you can see all the before photos here.) Our client wanted a built-in area in their kitchen for family meals, art projects/homework and a spot for the family desktop computer and printer. Their kitchen was generously sized and its style fit perfectly in their historic home. Our job was to make sure the new banquette felt as cohesive in the space as possible.
Two tricky things were in our way: the wall ovens and the edge of the kitchen island. You can see both in the below photo.

After playing around with different ideas, we all agreed that the run for the bench should be along the back wall. By putting a bench directly below the window, there would be just enough space for a bench with table and chairs in front. And by just enough we mean that there would be 4 feet of space (the bare minimum you want for a circulation path) between the table and the edge of the island. It would also push seating as far away from the ovens as possible.
However, if we built a bench below the window, the desktop computer couldn't stay in its current location. The bench would run right into it and it would be impossible to work on the computer. We were also concerned about having an electronic device, especially one so sensitive to temperatures like a desktop, located so closely to the ovens. It made sense to move it.
So we turned our eyes to this corner:

Of all the beautiful casework in the kitchen, this bookcase was the one that felt a little out of sync. With it gone, there would be just enough space on the wall to the left of the window for a new cabinet. In case you haven't noticed, just enough, was a re-occurring phrase for this project's design!

So cabinet was removed and given away. As fun as it is to watch people on HGTV take a sledge hammer to everything, we always try to salvage as much as we can during demo. Better for the environment AND you get to make someone's day with an awesome find. (I still wonder who bought the naked lady shower door from the Bridlemile Midcentury bathroom!)

The new computer cabinet would be directly adjacent to the table and bench. That way, someone could slide a chair over to work and then right back to the table to join in on the dinner conversation. A pull out keyboard tray would make for an ergonomic workstation and the computer's CPU would be stored in lower cabinets with just enough (there it is again!) space.

The cabinets beside the ovens would get doors to match the rest of the kitchen for concealed storage.

After reviewing the design with our client, they decided not to do drawers in the banquette bench. Not only would it be difficult to access with the table in front but there was already ample storage in this kitchen. Clean and simple was better for them in the long run.
Add in an upholstered cushion in classic navy, bentwood chairs & a marble trestle table and this banquette design was ready to go!


The Thonet Era chairs featured above were a close runner up but ultimately we decided to go with the Josef Hoffmann chairs in natural wood from DWR.

For the table, rather than have a traditional rectangular shape for the top, an oval would make getting in and around the banquette more comfortable. No accidental injuries from banging into sharp corners!


One of our favorite carpenters, George Ramos, fabricated the new cabinets, doors and banquette bench. His attention to detail is phenomenal!
Before he began, George visited the kitchen and took extensive notes. He reviewed the existing trim/crown/base and paneling details. He even reviewed the style of the beadboard running on the inside of their kitchen cabinets. Nothing escaped his attention to make this new casework look like it had always been a part of the original cabinet design.
Install day is my favorite. There's George getting the frame in place for the new computer cabinet.

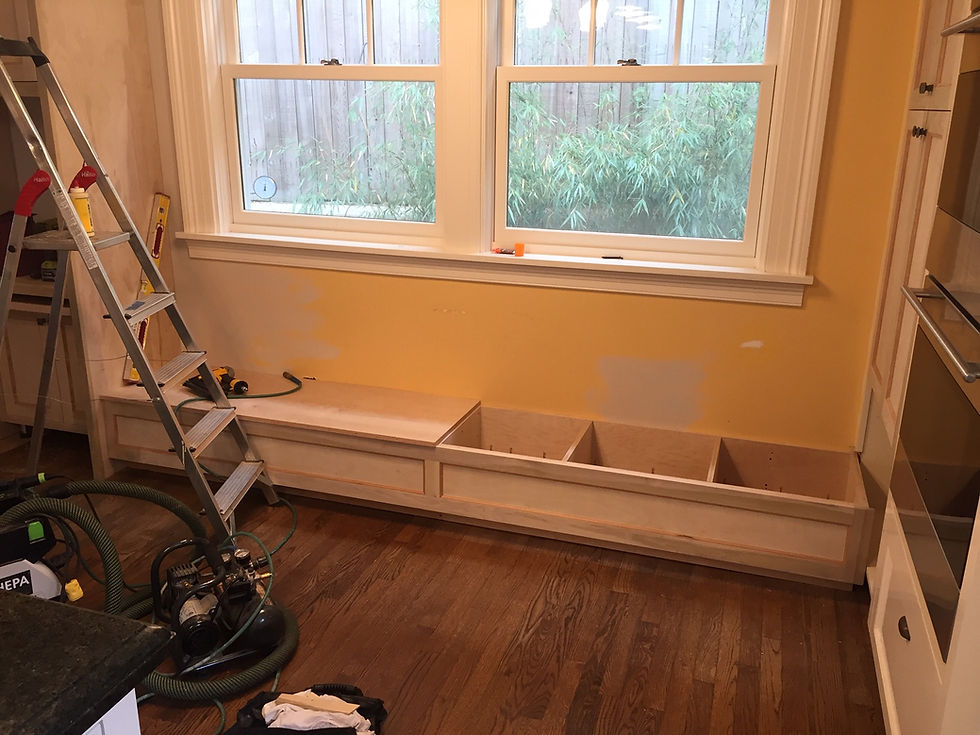
Banquette bench and CPU cabinet ready to install!

Doors on the cabinets! We decided to leave a void in the lower section as it would be very, very difficult to access and as we mentioned before, storage wasn't an issue in this kitchen.

And there's the new cabinet in place! We asked our clients to do a 'sit test' before the keyboard tray was installed. This way we knew it would be at the correct, comfortable height for them.

Stay tuned for the final reveal!


Comments